Whiteout WSB

Whiteout Survival event guide

Foundry Battle guide: win facilities before chasing kills

Foundry Battle is an alliance PvP battlefield where victory comes from Alliance Arsenal Points, not from isolated personal fights. Strong alliances enter with assigned groups, clear facility priorities, fast reinforcement, and enough discipline to leave bad fights before they drain the clock.

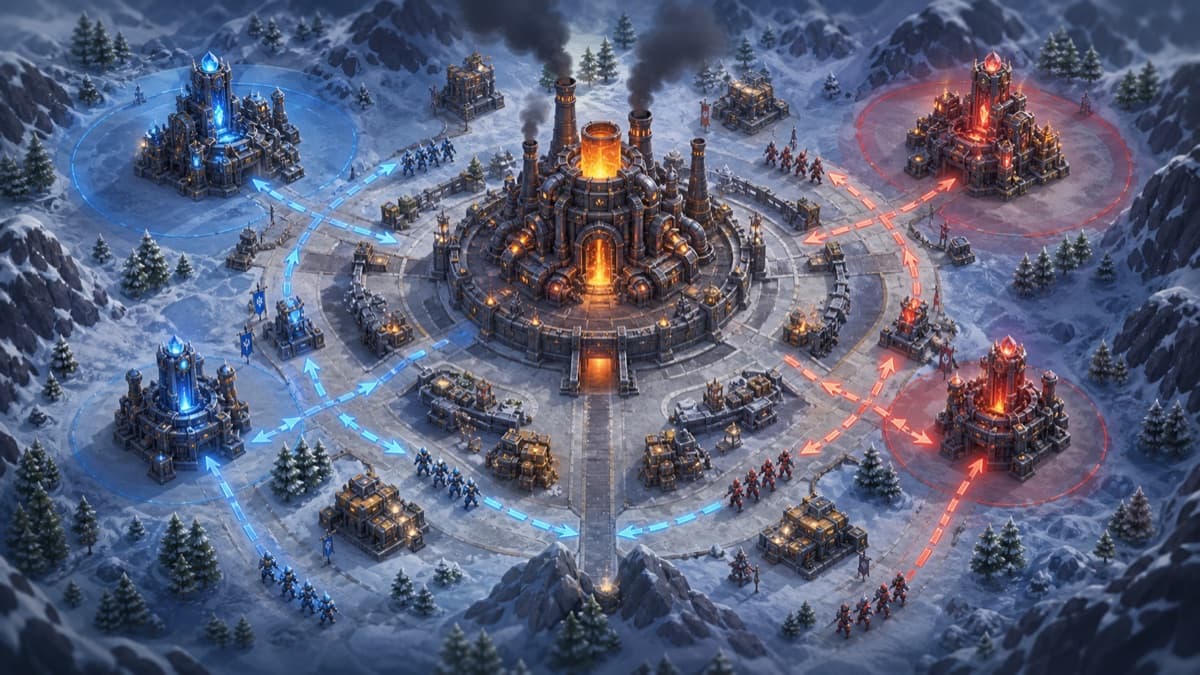
Foundry Battle strategy illustration with facilities, control zones, and reinforcement routes

Facility win condition

Treat the map as connected scoring zones: assigned buildings first, support facilities next, and central pressure when the group is ready.

1h

Battle

30+10

Legion

Points

Win by

Event type

Alliance PvP facility-control battle

Battle length

Public and official sources list the battle as 1 hour

Win condition

Finish with more Alliance Arsenal Points

Participants

Official wiki lists up to 30 combatants and 10 substitutes per legion

Troop risk

Troops do not die and are healed after battle, but healing speedups and tempo still matter

Before battle

Confirm registration, assigned legion, battlefield entry rules, and alliance plan

How the event works

Two alliances enter a separate battlefield and fight over facilities. Taking first control and holding buildings generates Arsenal Points. Some buildings also change the battle flow through buffs, teleporter cooldowns, mercenary attacks, or point-gain bonuses. The winning alliance is the one with the higher alliance score when time expires.

Battle flow

Foundry Battle is easier to manage when the alliance treats it as phases. Open with assigned targets, rotate pressure as the map unlocks, then use late objectives and scattered points to swing the result.

Foundry phase diagram

Foundry Battle is easier to manage when the alliance treats it as phases. Open with assigned targets, rotate pressure as the map unlocks, then use late objectives and scattered points to swing the result.

Opening: secure assigned facilities

Send players to their assigned side and occupy early buildings quickly. Avoid everyone flooding the same point unless the shotcaller asks for a coordinated push.

Middle: pressure high-value control

Fight for Prototype Sites and support facilities while keeping reinforcements on players who are holding. A building that stays blue or red keeps generating value.

Late: collect swings

Watch for the Imperial Foundry, Weapon Workshops, and scattered Arsenal Supplies. A late coordinated rally or fast supply collection can matter more than another random duel.

Facility priorities

The best target depends on the timer and your alliance strength. Do not only chase the central building; stable outer control and useful support buildings can decide the match.

Imperial Foundry
Central, high-pressure objective with major point value.
  • It is powerful, but holding it against a stronger alliance can cost too many troops and teleports.
  • Contest it when your strongest groups are ready, not when everyone is scattered or healing.
  • Use coordinated rallies and reinforcements instead of sending single marches into the strongest stack.
Prototype Sites and Repair Facilities
Reliable control points that often decide the score line.
  • Stable control creates continuous Arsenal Points and forces the enemy to respond.
  • Split groups by side so one lost building does not pull the whole alliance off the map.
  • Refresh reinforcements before holders are isolated and removed one by one.
Support facilities
Buildings that improve mobility, pressure, or point efficiency.
  • The Boiler Room improves point gain and building-control pressure, so it can be worth defending even when its raw score looks modest.
  • The Transit Station reduces free Advanced Teleporter cooldown, which helps fast rallies and recovery after losing a side.
  • Mercenary Camp attacks can weaken enemy-held buildings; use them on targets the alliance is actually contesting.

Alliance roles

Foundry Battle punishes everyone freelancing. Decide who calls targets, who attacks, who holds, and who watches supplies before the timer starts.

Shotcaller

R4/R5 or an assigned caller should give simple target calls, rally timing, and retreat instructions. Clear calls are more valuable than long explanations during the battle.

Attack group

Strong players pressure enemy holders, start key rallies, and rotate when their troops are low. They should not chase personal duels away from the current objective.

Holding group

Defenders occupy outer buildings, reinforce each other, and keep points ticking. This job is less flashy than attacking, but losing holders quietly loses the map.

Point discipline

Personal score is useful for rewards, but alliance victory depends on the alliance point total. Good players make personal actions serve the map plan.

Scattered Arsenal Supplies

When buildings change hands, temporary points can scatter around the structure. Watch the mini-map and collect them quickly, especially after a successful push.

Personal points versus winning

Offense, defense, and captures can build personal points, but personal MVP play should not override orders. A high personal score is not worth losing the facility that wins the match.

Common mistakes

Most Foundry losses come from slow coordination, not a single bad fight.

Chasing kills far from facilities while the enemy quietly holds the scoring buildings.
Leaving holders without reinforcements, then losing buildings one player at a time.
Using teleports for small fights and lacking mobility when the main target opens.
Following side chat or personal calls instead of the assigned shotcaller.
Winning a building but ignoring scattered Arsenal Supplies around it.
Prioritizing personal points or MVP attempts over the alliance score.